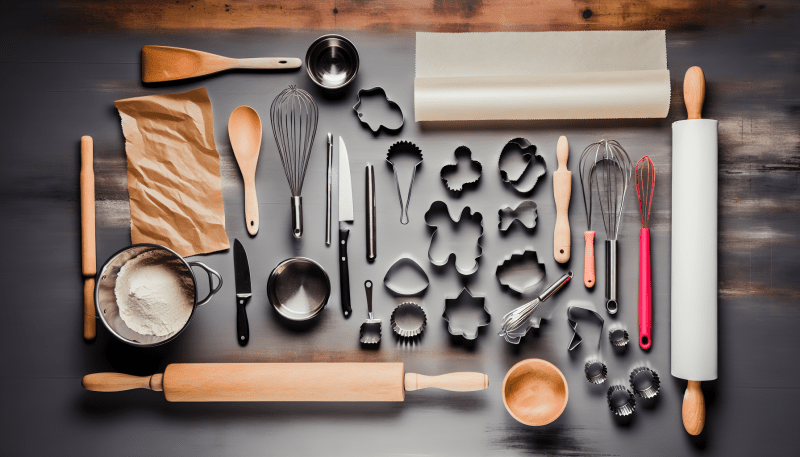
If you’re excited to learn to bake bread, having the right tools can make a big difference. You don’t need a ton of fancy gadgets, but a few essential items can help you on your journey. Here’s a quick rundown of what you’ll need to get started.
With these tools in your kitchen, you’ll be all set to learn to bake bread like a pro. Don’t forget, practice is key, so don’t be afraid to experiment and have fun along the way!
Simple Ingredients for Delicious Bread
When you decide to learn to bake bread, the first thing you’ll notice is that you don't need a long list of fancy ingredients. In fact, some of the best homemade bread comes from just a few simple staples. Let’s break it down.
1. Flour: This is your main player. All-purpose flour works wonderfully, but if you want a more rustic loaf, whole wheat flour is a great choice. Both give your bread different textures and flavors, so feel free to experiment!
2. Water: It might seem basic, but the right amount of water is key. Use warm water to help active dry yeast do its job. The perfect temperature can make a world of difference in how your bread rises.
3. Yeast: This little ingredient is what helps your dough rise and gives it that airy quality we all love. You can use active dry yeast or instant yeast, depending on what you've got on hand. Just remember to check the expiration date for the best results!
4. Salt: Don't skip this one! Salt not only enhances flavor but also strengthens the dough. Just a pinch can elevate your bread from good to amazing.
With these simple ingredients, you’re well on your way to mastering bread-making. So gather your supplies, roll up your sleeves, and let’s get started on this delicious journey as you learn to bake bread like a pro!
Step-by-Step Bread Making Process
Ready to dive into the delicious world of bread making? Here’s a simple step-by-step guide to help you learn to bake bread like a pro. Let’s get started!
Step 1: Gather Your Ingredients
You'll need basic ingredients: flour, water, yeast, sugar, and salt. It's amazing how these simple items come together to create something so tasty! Make sure everything is fresh for the best results.
Step 2: Mix Your Dough
In a large bowl, start by mixing the warm water with yeast and sugar. Let it sit for about 5-10 minutes until it’s foamy. Then, add in the flour and salt. Stir until it forms a sticky dough. Don’t worry about getting it perfect; that’s part of the process!
Step 3: Knead and Rise
Dust a clean surface with flour and place your dough on it. Now, knead it for about 10 minutes until it’s smooth and stretchy. Put it back in the bowl, cover it with a cloth, and let it rise in a warm place for about an hour or until it doubles in size. This is the magic moment!
Step 4: Shape and Second Rise
Once your dough has risen, punch it down gently to release the air. Shape it into a loaf or rolls, depending on what you crave. Place them in a greased pan, cover, and let them rise again for about 30 minutes. Your kitchen will soon smell amazing!
Step 5: Bake and Enjoy
Preheat your oven to 375°F (190°C). Bake your bread for about 25-30 minutes or until it’s golden brown. Let it cool for a bit (if you can resist the smell!) before slicing. Now you know how to learn to bake bread that impresses everyone!
Tips for Perfecting Your Bread Recipe
Getting the perfect loaf of bread isn’t just about following a recipe; it’s about understanding some key tips that can take your baking game to the next level. If you want to learn to bake bread like a pro, here are some easy-to-apply tips that will help you achieve that crispy crust and soft, fluffy interior.
1. Measure Ingredients Accurately: Baking is as much a science as it is an art. Use a kitchen scale for the best results. This way, you’ll have the right proportions, resulting in consistent dough every time.
2. The Right Temperature: Yeast loves warmth! Make sure your water is at the right temperature (around 110°F to 115°F) when you mix it with your yeast. Too hot and you might kill the yeast; too cool and the dough will rise too slowly. A simple kitchen thermometer can be a big help here.
3. Knead with Love: Kneading helps develop gluten, which is crucial for structure. Don’t rush this step! Spend about 10 minutes using the heel of your hand to stretch and fold the dough. It should feel smooth and elastic when you’re done.
4. Be Patient with Rising: Give your dough plenty of time to rise until it doubles in size. Other factors like room temperature can impact rising time, so keep an eye on it. If it’s a bit chilly, it might take longer, but patience pays off!
By following these tips, you'll be well on your way to creating beautiful bread. Remember, the more you practice, the better you’ll get, so don’t get discouraged and keep experimenting as you learn to bake bread!